I have no idea when I became this type of mom, but when I was planning our first trip to Disney World as a family I knew I had to have matching t-shirts for my family. I looked on Etsy and couldn’t find exactly what I wanted, either in design or price. That said, I am not crafty in any sense of the word, so when I declared to my husband I was making matching freezer paper shirts, he rolled his eyes and mentally threw away $50, because that is pretty much what always happens with my crafting attempts: spend money on supplies and nothing is produced.
Once I had an idea of exactly what I wanted, I had no idea how to make it. After scouring the internet I finally found a tutorial that inspired the creation process of my shirts. Also as a bonus-the supplies weren’t that expensive so if I totally screwed it up I wouldn’t have lost much.
A whopping $25 and a couple of hours later not only was I impressed with my own skills but my husband was stoked that I didn’t force him to wear a shirt that he is embarrassed by!
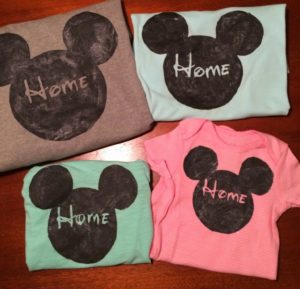
It was SO easy I just have to share with you how I did it. You can use this method for pretty much any design you can imagine, on any type of clothing. When searching for online tutorials I am always intimidated by craft bloggers tutorials-they manage to make everything look perfect so I just feel like I am bound to screw up. Hopefully you realize that I am the epitome of a non-crafty person and realize if I can do it-so can you!
Disclaimer: Only to prove how much I am not a craft blogger you will notice I took pictures of each step with different shirts. I’d like to say it was done on purpose by way of showing you each shirt style, but really it is because I forgot to take pictures of various steps with each shirt, whoops!
Supplies:
T-shirt (I bought mine at Walmart for $3 each)
Fabric paint
Sponge brush (the kind with the little black head)
Freezer paper (found with the aluminum foil and saran wrap)
X-acto knife
Hair dryer
Something to cut out on, I used a cutting board
Cardboard (I cut up a diaper box)
Step 1. First things first-unless you are an awesome artist you are going to need a stencil. I can’t freehand anything, my daughter’s stick figures are about 100x better than my own. I also don’t own a printer at home so I got real fancy and traced Mickey’s head by taping the freezer paper (shiny side down) onto the screen of my laptop and traced.
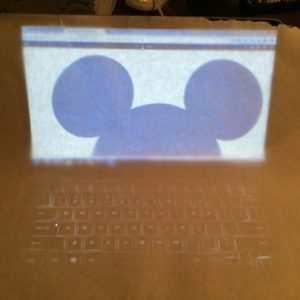
I wasn’t really sure what size Mickey head would be best for each person (our shirt sizes varied from 6 months to 2XL) so I would magnify Mickey and slide the laptop screen inside the shirt to determine what looked best. Luckily, $3 Walmart shirts are thin enough for this to work-if I was making something of better quality I would preplan and print out a stencil. You will notice on the picture above that Mickey’s bottom half is cut off. To finish his head I would just scroll down and move my paper up, lining up my already drawn lines with his lower ears.
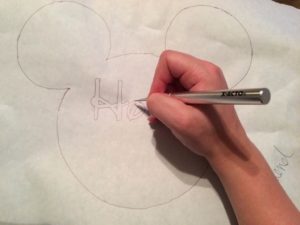
Once I had the main stencil, I knew I wanted to have the word “Home” in the middle. Disney has a thing about saying, “Welcome Home!” to their guests so I thought it was cute. Also, while I wasn’t totally trying to knock of The Home T, I do admire them. Imitation is the sincerest form of flattery, or something like that… Just like the Mickey head size, I didn’t know what the best size font would be for each Mickey so I downloaded the Waltograph font and wrote the word Home in Word. I was mostly looking for the most proportionate sized font. When I was tracing my letters on Mickey’s head, I wasn’t worried about having it centered-I was going to cut out the letters anyway so it wouldn’t matter.
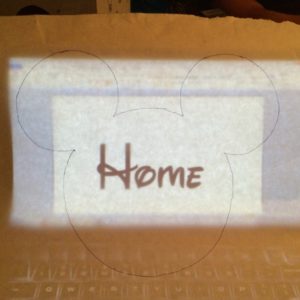
Step 2. Work on cutting out your stencil. Cutting out the letters was by far the most tedious and frustrating part. So much so that after I finished my first shirt I decided that only one of us would have the word home. I actually did my first shirt on one day and took a break. I decided that the first has to be the hardest and gave it another go. Luckily, that very much was the case, and while it was annoying to cut out these intricate little letters with an x-acto knife, I am glad I took the extra time.
Step 3. The next step is to iron on your brand new stencil, shiny side down. Pro-tip: if you are using my fabulous method of taping your freezer paper to the computer, make sure to remove the tape before ironing, otherwise the tape will melt into your shirt, and that isn’t cute.
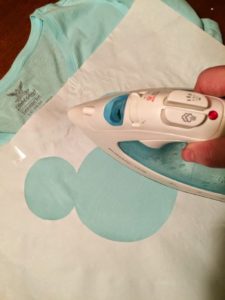
After I had Mickey lined up exactly where I wanted I grabbed my letters and placed them where I wanted on my shirt. With the larger portion of my stencil it was obvious which side was shiny side but my letters were a bit more difficult. Unfortunately, I guessed wrong on more than one occasion and had to peel the melted letter off my iron.
Step 4. Once I had every shirt stenciled up, I started the painting process. I put a section of my cut up diaper box on the inside of the shirt so that paint didn’t soak through. Then, I just squirted my paint in a bowl and worked my way from edges in. I found that the trick to good coverage was dabbing vs painting like you would with a traditional paintbrush. When I attempted a stroke with the brush, it would pull at the fabric and I was concerned it would break the seal.
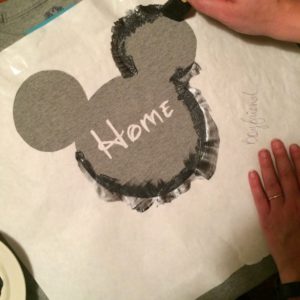
Once you have full coverage (make sure to pay attention to the smallest of areas-for me that was within the letters H and O) wait 4 hours for everything to dry. Pro-tip: If you are impatient like I am, break out a hair dryer and have it dried within five minutes!
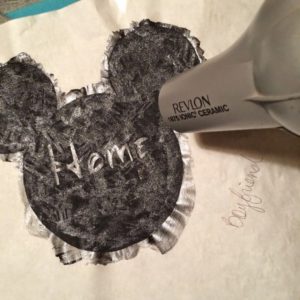
Step 5. Now for the really fun and oddly satisfying part! Because I wanted to have a more dramatic reveal, I peeled off the letters first, revealing a crisp and clean font below the paint. It was a bit difficult to remove the freezer paper-it was definitely sealed on but once I got a little corner the remainder of the letter was easy to remove. Then to the grand finale, and just like the fireworks highlighting Cinderella’s Castle in Magic Kingdom, my finished project brought tears to my eyes.
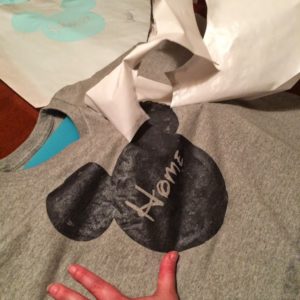
I know these aren’t the best, and they are far from perfect (when held up to light you can find a few spots where I missed total paint coverage) but I was insanely proud of them. We received a ton of compliments while at the park and lots of questions about where I got the shirts.

So if you are like me and have an exact design in your mind, no special machines, tools, or skills-you can easily make your own family shirts!


